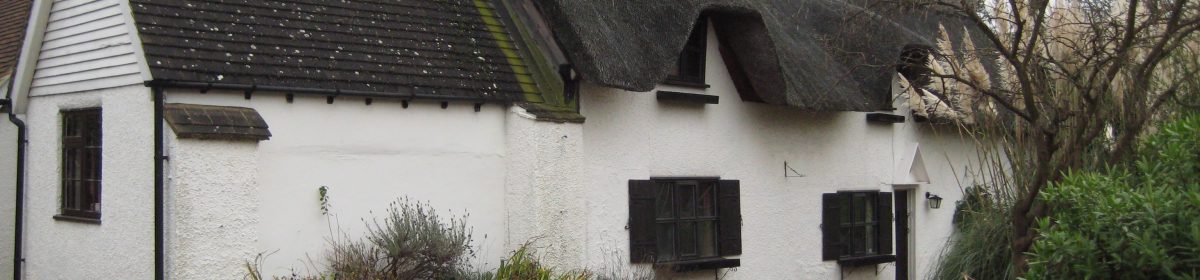
One of the things we were really looking forward to with renovating the old house was going back, as far as possible, to the original structure and understanding its development over the centuries. Right from the day we moved in we’ve been planning the removal of recent additions, particularly the kitchen, and wondering what we’d find.

With the new kitchen usable we were finally able to go for it. We started by getting rid of the white goods and donated them to Scope who were able to come and collect, a win win for both of us. Then we tackled the run of units along the back wall with the sink and all the pipes and plumbing including the connection to the water supply for the extension, so we had to be careful not to disrupt that.
As the builders were tackling the front wall and the fall-out, literally, from removing the old boiler we finished off by removing the old worktop, units, gas hob, oven housing and finally shelving taking us back to the original four walls.
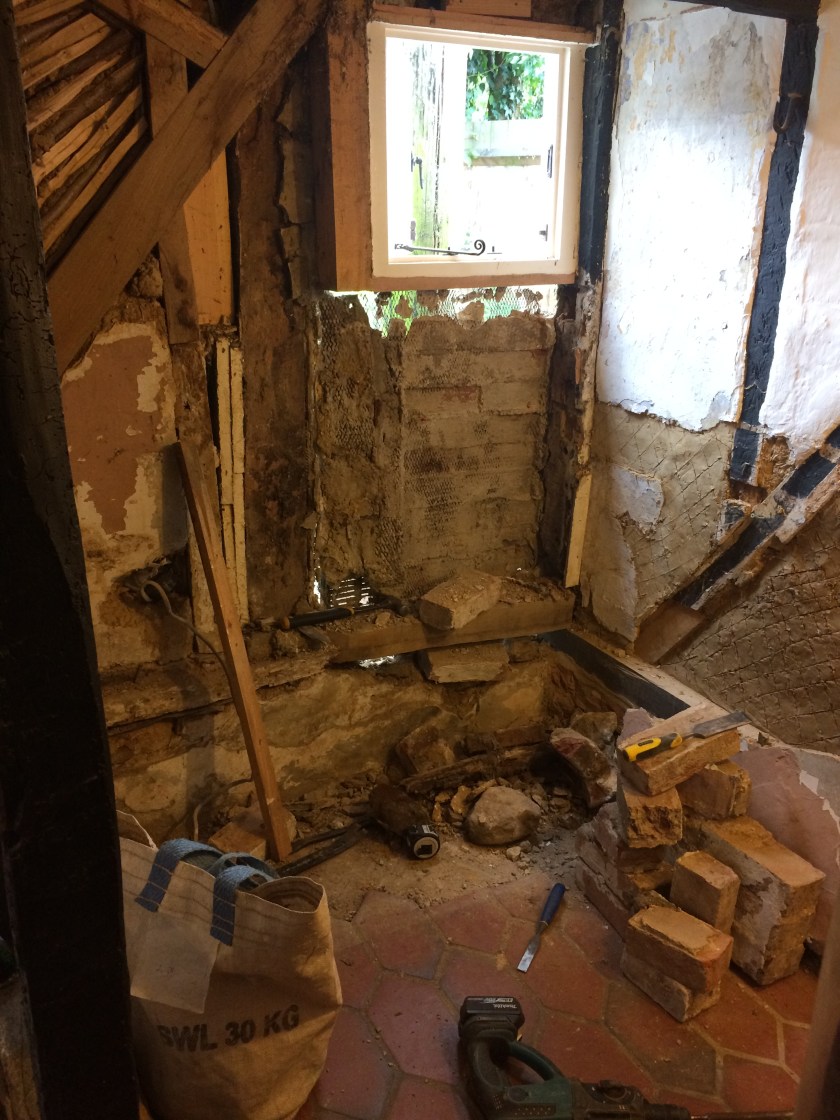
One of the unexpected discoveries was a brick arch in the back wall of the kitchen that could have been an old bread oven as it is too low to be a doorway. We have one off the hall fireplace and chimney and there may have been a second one if the house was originally two cottages. It did have two front doors so it’s possible. More research needed.
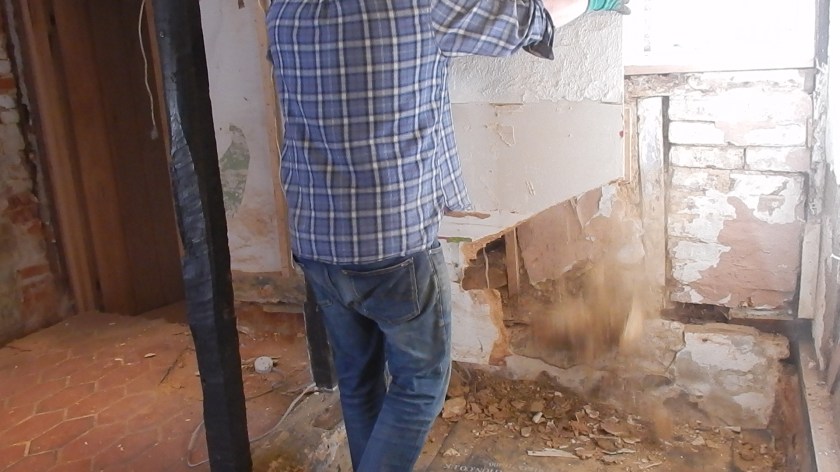
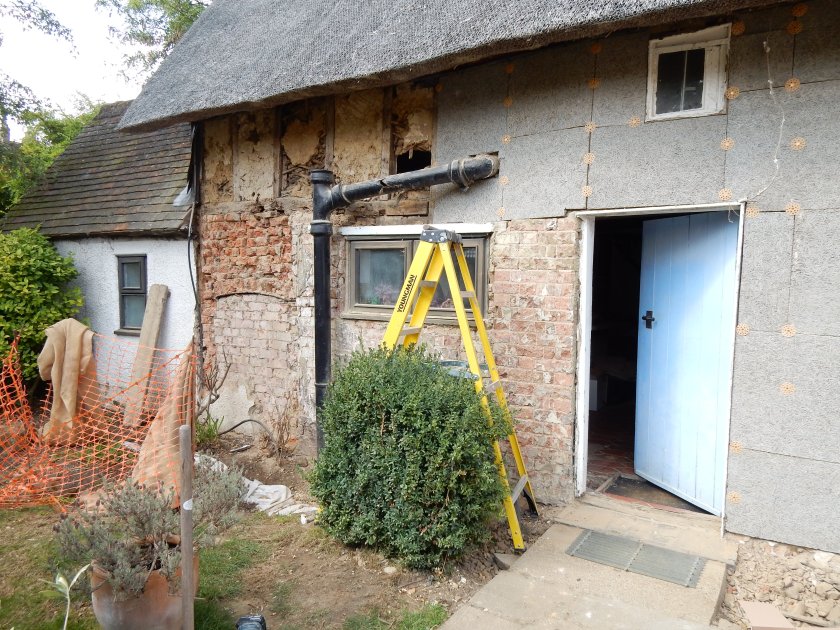
More concerning was the damage to the wall behind where the gas hob had been on the gable end wall, part of which backs onto the bathroom. When M pulled off the plasterboard years of old plaster, dust, dirt and all sorts poured out onto the kitchen floor. Both exciting and nerve-racking to watch. It confirmed what we suspected, and the builders had found when they started tackling the first floor level of the gable, this wall is a mess. Something had to be done as there were more gapping holes to the outside and so we agreed a further and final extension to the works to renovate the ground floor only of the gable end leaving upstairs until next year.
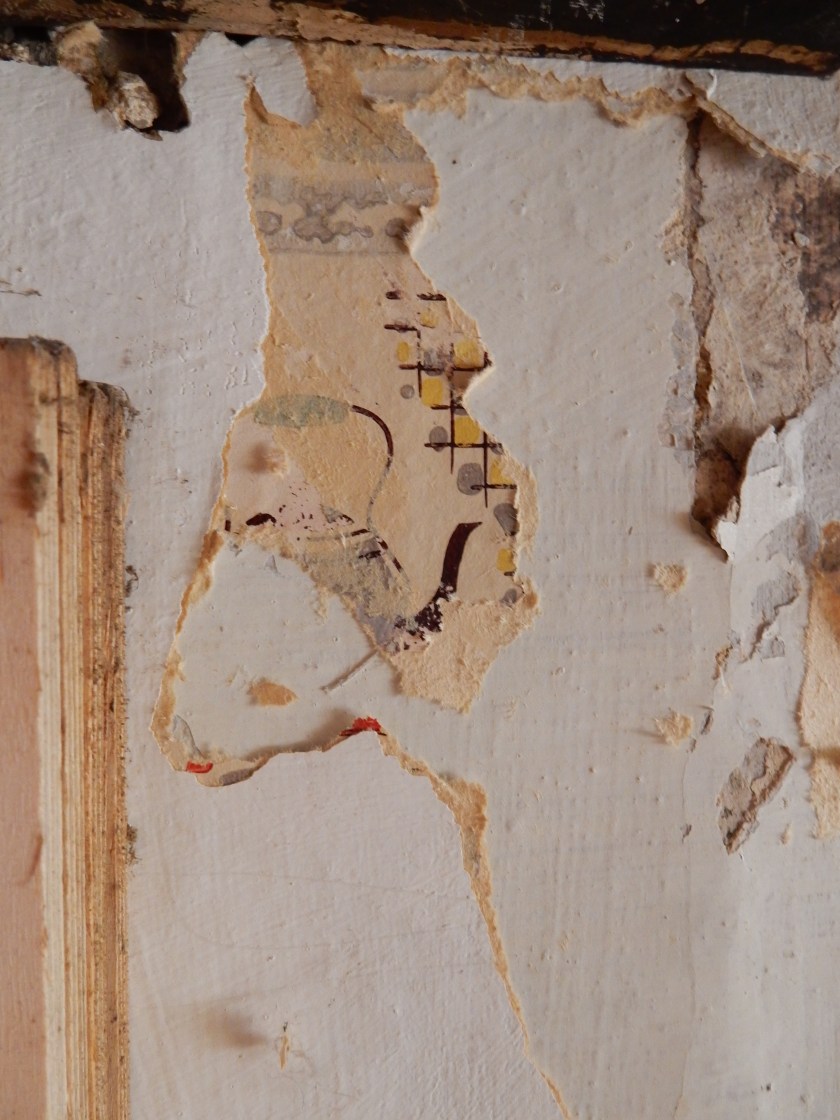
To help keep costs down we have started working out what we can do instead of paying the builders. A relatively easy job is removing the modern paint finishes from the wattle and daub walls. This means we only need to pay to have them plastered and I’m finding, with care, I can save more of the original daub. I’m using Kling Strip which is a water based non-invasive paint stripper which you paste on, cover in a film to stop it drying out and remove about 24 hours later. Having tried a range of different products over the years this has definitely proved to be the best at removing the unwanted paint and leaving the surface beneath undamaged. I just have a lot of panels and doors to strip!
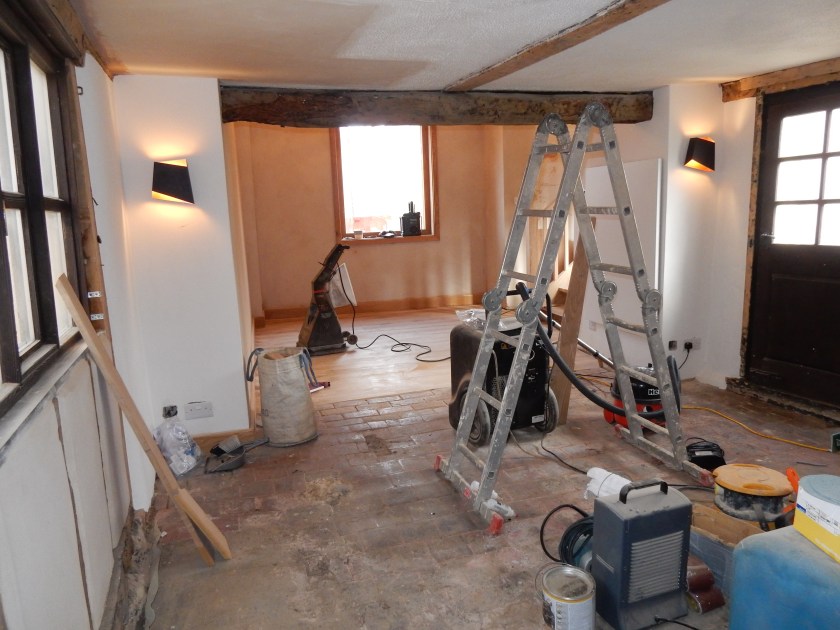
One job I was happy not to be doing was cleaning up the tiles uncovered when they took up the concrete floor in the cottage part of the sitting room. We were delighted to find them although we think they’re probably not as old as the brick tiles in the hall. They have also seen more wear and tear possibly due to the fact that this room was the beer house at the end of the 18th and early 19th centuries. There were chunks missing where a concrete base had been installed for a spiral staircase that we took out some years ago, no tiles in the fireplace and a number of cracked and broken tiles that needed replacing. The specialist brickie and I discussed each repair in detail and he did a great job of only replacing what was absolutely necessary. Between him and the carpenter they managed to make a neat join between the old cottage sitting room floor and the brand new wooden oak floor in what had been the smithy finally removing the 50cm height difference between the two.
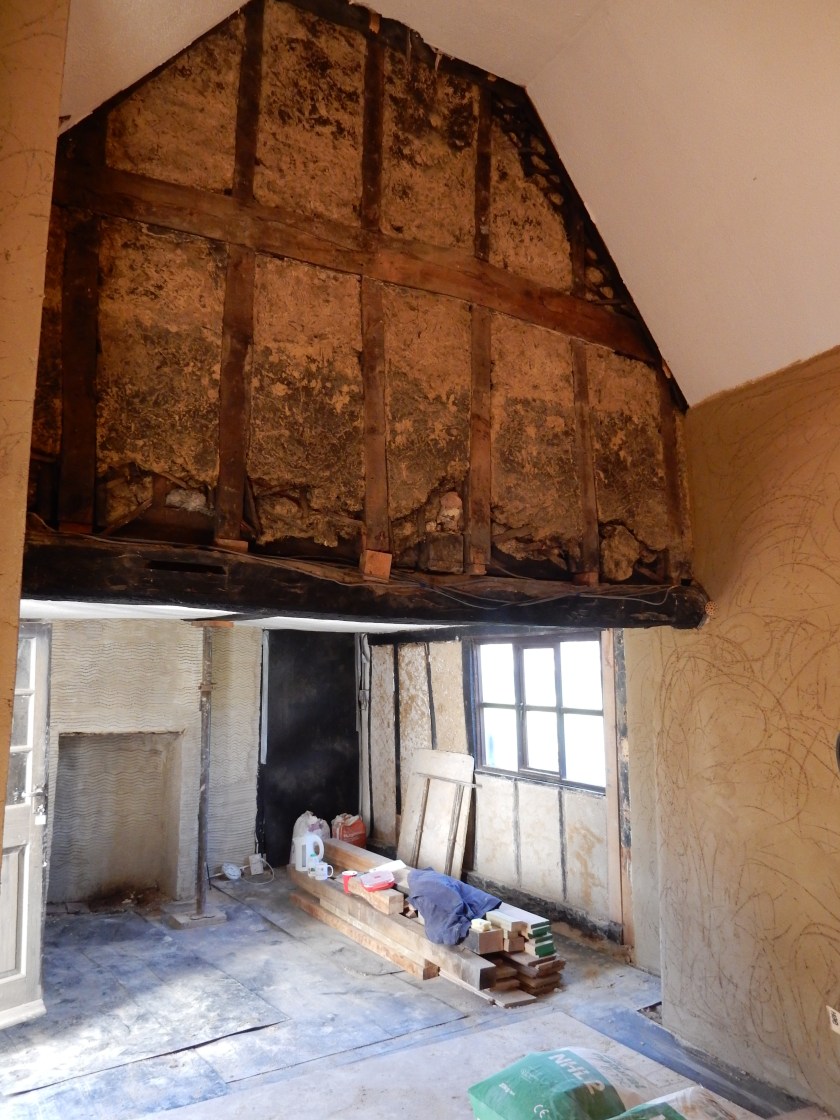
Probably the most exciting reveal was in the smithy part of the sitting room which was originally a lean to on the side of the cottage. The original gable end wall above ground floor level was still intact. When they removed the modern plaster and faux beams they found roofing felt. When they peeled this back we found the original timber frame and daub that had never been painted or plastered and it’s amazing. We managed to convince the builders that, apart from filling in along the bottom where the panels had been damaged knocking through to make the smithy part of the sitting room, we wanted to leave it exactly as they found it. It’s stunning and makes us feel like we’re in a medieval hall. It’s finding features like this which makes all the disruption and expense worthwhile.
A more depressing reveal was the state of the new oak flooring in the smithy part of the sitting room and in the dining room. When they took up the floor covers to start fitting the stairs and seal the wood the builders found that all the planks had swollen and turned up at the edges making it feel like you were walking across a sea of waves. As it was probably the result of all the water in the lime render and plaster they brought in a de-humidifier which they wanted us to keep going 24/7 and then left us to it while the two rooms dried out. We felt deserted as a couple of weeks passed with no builder action.
So the project stalled again and we faced, who knows for how long, no progress on finishing the work. This was another low point as Christmas started to loom into view with a long booked family lunch in the diary for the 15 December and no dining or sitting room in which to host them. With it turning increasingly colder we were still having to walk across the garden to get to and from the new kitchen and sleeping in the spare bedroom with no heating. We really just wanted to get it all done so I’ve been chasing the builders to get a date for them to come back and finally finish off.

Oh this is such an exciting read.. ..Hurrah for the end wall ( how old is it?) boo to the swollen oak floor. I know you haven’t got as far as you wanted to in time for Christmas but deck that wall with a bough of holly and have a glass or two of mead and all will be well!
LikeLike
It could be as old as the late 1400s, more likely late 1500s, so very old! I’m just about to go and tackle some more of it, a glutton for punishment!
LikeLike
Looking like lots more progress since I was there – enjoy a restful xmas 🙂
LikeLike
Yes, it’s good to step back occasionally and see how far we’ve come. We’re certainly a lot more than half-way through!
LikeLike